


Deploying machine learning models can be daunting, particularly when considering the best environment to host your models. AWS and GCP offer robust cloud platforms, but the setup process varies significantly. Recently, we wrote a guide on deploying MLflow on Google Cloud Platform, and now we will share a comprehensive, step-by-step guide on setting up MLflow on AWS using Terraform. From setting up VPC to creating a database, ECS service and setting up security groups, we’ll walk you through the entire process modularly, with each section dedicated to a specific component.
Give a read to understand how to create a robust, secure, and scalable MLflow setup on AWS, all while leveraging the power and convenience of Infrastructure as Code through Terraform.
Repository
For easy access and guidance, we’ve set up a repository containing all essential materials related to this guide. If you have any questions or run into problems, you can find answers there.
AWS CLI
- Install AWS CLI: Follow this instruction on installing the AWS Command Line Interface (CLI).
- Generate your access key: Create a key for the user to manage your Terraform resources following this instruction.
- Login with AWS Configure: Use the AWS Configure command to log in.
Terraform setup
Terraform version used here : v1.5.0
- Install Terraform: Follow the official documentation to install Terraform on your system.
- Automatic Documentation: For automatic documentation, you can install terraform-docs. Follow this documentation.
Creating an S3 Bucket for Terraform State Storage
First, you need to store the Terraform state in a cloud storage service like Amazon S3, rather than locally. For more details on Terraform state, you can read this documentation.
Follow these steps to create an S3 bucket for storing your Terraform state:
- Go to Amazon S3 and click “Create Bucket.”
- Choose a name and region for your bucket.
You can leave the rest of the settings at their default values.
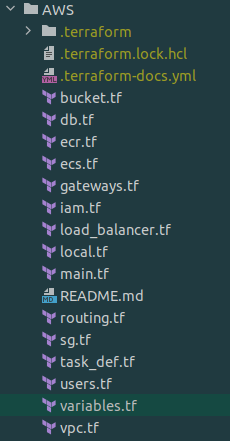
Project Structure
Upon completing the instructions, your Terraform project should have the following structure:
After each section, use terraform plan to preview the resources that will be added, and terraform apply to apply those changes.
Variables
Create a variables.tf file and begin by defining essential variables for the project.
variable "env" {
  default     = "test"
  description = "Name of the environment"
}

variable "app_name" {
  default = "mlflow-terraform"
}

variable "region" {
  default = "eu-central-1"
}

variable "ecs_service_name" {
  default = "mlflow-test"
}

variable "ecs_task_name" {
  default = "mlflow-test"
}
Next, we will create variables for our network. You can use different subnetwork ranges if you prefer. Change the values for your_vpn, zone_a, zone_b and region to match your project.
variable "cidr" {
  default     = "10.0.0.0/25"
  description = "Cidr block of vpc"
}

variable "private_cidr_a" {
  default = "10.0.0.0/28"
}

variable "private_cidr_b" {
  default = "10.0.0.16/28"
}

variable "db_cidr_a" {
  default = "10.0.0.32/28"
}

variable "db_cidr_b" {
  default = "10.0.0.48/28"
}

variable "public_cidr_a" {
  default = "10.0.0.96/28"
}

variable "public_cidr_b" {
  default = "10.0.0.112/28"
}

variable "your_vpn" {
  default = "0.0.0.0/0"
}

variable "zone_a" {
  default = "eu-central-1a"
}

variable "zone_b" {
  default = "eu-central-1b"
}

variable "internet_cidr" {
  default     = "0.0.0.0/0"
  description = "Cidr block for the internet"
}
Create a local.tf file that will hold our tags:
 locals {
  # Common tags to be assigned to all resources
  tags = {
    Name        = "mlflow-terraform"
    Environment = var.env
  }
}
Main file
In main.tf, we will insert our basic configuration; the version should be the latest available.
terraform {
  required_providers {
    aws = {
      source  = "hashicorp/aws"
      version = "~> 5.4.0"
    }
  }
  backend "s3" {
    bucket = "your bucket name"
    key    = "test/terraform.tfstate"
    region = "eu-central-1"
  }
required_version = ">= 1.5"
}

provider "aws" {
  region = var.region

  default_tags {
    tags = local.tags
  }
}
After creating the main file, you should run terraform init to install the required providers and to initialize the state in the bucket. You should receive confirmation that the providers have been successfully installed.
S3 Bucket
In the new file bucket.tf, we will create a bucket for storing our artifacts from MLflow. The URI for the bucket needs to be saved, as we will be using it later.
resource "aws_s3_bucket" "mlflow-bucket" {
  bucket = "mlflow-bucket-${var.app_name}-${var.env}"

}

resource "aws_ssm_parameter" "mlflow-bucket_url" {
  name  = "/${var.app_name}/${var.env}/ARTIFACT_URL"
  type  = "SecureString"
  value = "s3://${aws_s3_bucket.mlflow-bucket.bucket}"

  tags = local.tags
}
User
In the file users.tf, we will create a user that will be used by MLflow to access bucket objects.
data "aws_iam_policy" "bucket_access" {
  name = "AmazonS3FullAccess"
}

resource "aws_iam_user" "mlflow_s3" {
  name = "mlflow-access-s3"
  permissions_boundary = data.aws_iam_policy.bucket_access.arn

    tags = local.tags
}
resource "aws_iam_user_policy_attachment" "attach-policy" {
  user       = aws_iam_user.mlflow_s3.name
  policy_arn = data.aws_iam_policy.bucket_access.arn
}
Next, we need to generate a key for the user so that it can authenticate. The key and key ID will be placed in the Parameter Store, as we will need them later.
resource "aws_iam_access_key" "mlflow_s3" {
  user = aws_iam_user.mlflow_s3.name

}

resource "aws_ssm_parameter" "mlflow_key_id" {
  name  = "/${var.app_name}/${var.env}/AWS_ACCESS_KEY_ID"
  type  = "SecureString"
  value = aws_iam_access_key.mlflow_s3.id

  tags = local.tags
}

resource "aws_ssm_parameter" "mlflow_key_secret" {
  name  = "/${var.app_name}/${var.env}/AWS_SECRET_ACCESS_KEY"
  type  = "SecureString"
  value = aws_iam_access_key.mlflow_s3.secret

    tags = local.tags
}
ECR
ECR will hold our Docker image with MLflow; a new file should be created, named ecr.tf
resource "aws_ecr_repository" "mlflow_ecr" {
  name                 = "${var.app_name}-${var.env}-image"
  image_tag_mutability = "MUTABLE"

  image_scanning_configuration {
    scan_on_push = true
  }
  encryption_configuration {
    encryption_type = "AES256"
  }
  tags = local.tags
}
After the ECR is created, you should push your Docker image. Here is an instruction on how to do it. The image needs to be pushed with the tag latest.
Network
Create a new file named vpc.tf – this is where we will define resources related to networking.
First, we’ll create a Virtual Private Cloud (VPC). All subsequent resources we create will be associated with this VPC.
resource "aws_vpc" "main" {
  cidr_block           = var.cidr
  tags                 = local.tags
  enable_dns_support   = true
  enable_dns_hostnames = true
}
Here we are creating two private subnets that will be used for ECS, as we want to ensure high security ECS will only have a private address. These subnets will be connected to NAT gateway. They should be located in two separate zones within the region you choose.
resource "aws_subnet" "private_subnet_a" {
  vpc_id            = aws_vpc.main.id
  cidr_block        = var.private_cidr_a
  availability_zone = var.zone_a
  tags              = local.tags
}

resource "aws_subnet" "private_subnet_b" {
  vpc_id            = aws_vpc.main.id
  cidr_block        = var.private_cidr_b
  availability_zone = var.zone_b
  tags              = local.tags
}
Next, we will create a public subnets (the IP ranges that we are using here are private but because of the fact that they will be connected to internet gateway I called them public as you can reach public IPs from them) that will be used by load balancer, they will be connected to internet gateway.
resource "aws_subnet" "public_subnet_a" {
  vpc_id            = aws_vpc.main.id
  cidr_block        = var.public_cidr_a
  availability_zone = var.zone_a
  tags              = local.tags
}

resource "aws_subnet" "public_subnet_b" {
  vpc_id            = aws_vpc.main.id
  cidr_block        = var.public_cidr_b
  availability_zone = var.zone_b
  tags              = local.tags
}
We are also creating two subnets in two separate zones for our database. Since the database configuration accepts a subnet group instead of individual subnets, we’ll need to create a subnet group as well.
resource "aws_subnet" "db_subnet_a" {
  vpc_id            = aws_vpc.main.id
  cidr_block        = var.db_cidr_a
  availability_zone = "eu-central-1a"
  tags              = local.tags
}

resource "aws_subnet" "db_subnet_b" {
  vpc_id            = aws_vpc.main.id
  cidr_block        = var.db_cidr_b
  availability_zone = "eu-central-1b"
  tags              = local.tags
}

resource "aws_db_subnet_group" "db_subnet_group" {
  name       = "${var.app_name}-${var.env}-db-subnet-group"
  subnet_ids = [aws_subnet.db_subnet_a.id, aws_subnet.db_subnet_b.id]
  tags       = local.tags
}
Gateways
As the network is all set up the next step is adding gateways to ensure the we have proper traffic from and to the internet. Create gateways.tf file.
First, we will setup basic internet gateway:
resource "aws_internet_gateway" "main" {
  vpc_id = aws_vpc.main.id
  tags   = local.tags
}
Next, we will set up NAT gateways; we use aws_eip to reserve a public IP address assigned to our NAT gateway, as the gateway needs this address to communicate with other public addresses.
resource "aws_eip" "nat_ip_a" {
  domain   = "vpc"
  tags = local.tags
}

resource "aws_eip" "nat_ip_b" {
  domain   = "vpc"
  tags = local.tags
}

resource "aws_nat_gateway" "mlflow_nat_a" {
  allocation_id = aws_eip.nat_ip_a.id
  subnet_id     = aws_subnet.public_subnet_a.id

  depends_on = [aws_internet_gateway.main]

  tags = local.tags
}

resource "aws_nat_gateway" "mlflow_nat_b" {
  allocation_id = aws_eip.nat_ip_b.id
  subnet_id     = aws_subnet.public_subnet_b.id

  depends_on = [aws_internet_gateway.main]

  tags = local.tags
}
Routing
Last network related topick that we need to do is routing. Create routing.tf file.
First, we create a route that will be use by database and load balancer:
resource "aws_route_table" "public" {
  vpc_id = aws_vpc.main.id

  route {
    cidr_block = var.internet_cidr
    gateway_id = aws_internet_gateway.main.id
  }

  tags = local.tags
}
Then we will create route tables that will let us route traffic from our NAT gateways to the internet:
resource "aws_route_table" "private_a" {
  vpc_id = aws_vpc.main.id

  route {
    cidr_block = var.internet_cidr
    gateway_id = aws_nat_gateway.mlflow_nat_a.id
  }

  tags = local.tags
}

resource "aws_route_table" "private_b" {
  vpc_id = aws_vpc.main.id

  route {
    cidr_block = var.internet_cidr
    gateway_id = aws_nat_gateway.mlflow_nat_b.id
  }

  tags = local.tags
}
Last step is adding route table associations:
resource "aws_route_table_association" "private_subnet_association_a" {
  route_table_id = aws_route_table.private_a.id
  subnet_id      = aws_subnet.private_subnet_a.id
}

resource "aws_route_table_association" "private_subnet_association_b" {
  route_table_id = aws_route_table.private_b.id
  subnet_id      = aws_subnet.private_subnet_b.id
}


resource "aws_route_table_association" "db_subnet_association_a" {
  route_table_id = aws_route_table.public.id
  subnet_id      = aws_subnet.db_subnet_a.id
}

resource "aws_route_table_association" "db_subnet_association_b" {
  route_table_id = aws_route_table.public.id
  subnet_id      = aws_subnet.db_subnet_b.id
}


resource "aws_route_table_association" "public_subnet_association_a" {
  route_table_id = aws_route_table.public.id
  subnet_id      = aws_subnet.public_subnet_a.id
}

resource "aws_route_table_association" "public_subnet_association_b" {
  route_table_id = aws_route_table.public.id
  subnet_id      = aws_subnet.public_subnet_b.id
}
Security groups
To ensure proper traffic flow within our network, we’ll also need to define the appropriate security groups. Create a new file called sg.tf.
First, we’ll create a security group that allows communication from our VPN to the RDS (Relational Database Service).
VPN -> RDS
resource "aws_security_group" "allow_ingress_from_vpn" {
  name        = "allow_ingress_from_vpn"
  description = "Allow inbound traffic from VPN"
  vpc_id      = aws_vpc.main.id

  tags = local.tags
}

resource "aws_security_group_rule" "db_ingress" {
  type              = "ingress"
  description       = "TLS from VPN"
  from_port         = 5432
  to_port           = 5432
  protocol          = "tcp"
  cidr_blocks       = [var.your_vpn]
  security_group_id = aws_security_group.allow_ingress_from_vpn.id
}
Next, we’ll create a security group specifically for the ECS (Elastic Container Service). This security group will define the networking rules for incoming and outgoing traffic related to the ECS tasks and services, ensuring they can communicate securely with other resources within our infrastructure.
ECS -> RDS
resource "aws_security_group" "ecs_sg" {
  name        = "${var.env}-${var.app_name}-ecs-sg"
  description = "Contains all the rules for ECS"
  vpc_id      = aws_vpc.main.id

  tags = local.tags
}
This rule will allow traffic from our ECS service to the internet. This ensures that the containers running in the ECS service can access external resources or APIs as needed (they will do it using NAT gateway as ECS will not have a public IP).
ECS -> Internet
resource "aws_security_group_rule" "ecs_egress_all" {
  description       = "ECS outbound"
  type              = "egress"
  from_port         = 0
  to_port           = 65535
  protocol          = "tcp"
  cidr_blocks       = [var.internet_cidr]
  security_group_id = aws_security_group.ecs_sg.id
}
The second rule will permit traffic from the load balancer to the ECS service. This is crucial for distributing incoming internet traffic across multiple containers in the ECS service.
ECS <- LB
resource "aws_security_group_rule" "ecs_ingress" {
  description              = "ECS outbound"
  type                     = "ingress"
  from_port                = 80
  to_port                  = 8080
  protocol                 = "tcp"
  security_group_id        = aws_security_group.ecs_sg.id
  source_security_group_id = aws_security_group.lb_sg.id
}
This security group will be configured to allow traffic from the ECS service to the RDS database. This enables your containers in ECS to communicate with the database in RDS.
RDS <- ECS
resource "aws_security_group" "rds_sg" {
  name        = "${var.env}-${var.app_name}-rds-sg"
  description = "Allow inbound from ECS"
  vpc_id      = aws_vpc.main.id

  tags = local.tags
}

resource "aws_security_group_rule" "rds_ingress" {
  description              = "ECS inbound"
  type                     = "ingress"
  from_port                = 5432
  to_port                  = 5432
  protocol                 = "tcp"
  security_group_id        = aws_security_group.rds_sg.id
  source_security_group_id = aws_security_group.ecs_sg.id
}
The final security group we will create will be designated for the load balancer. This configuration ensures that the load balancer can properly distribute incoming application traffic across multiple targets, such as ECS instances, in a secure manner.
resource "aws_security_group" "lb_sg" {
  name   = "lb_security_group"
  vpc_id = aws_vpc.main.id

  tags = local.tags
}
The first rule will restrict incoming traffic to originate solely from our VPN. If you’re not using a VPN or if you want ML Flow to be publicly accessible, you can either skip this rule or use var.internet_cidr in place of var.your_vpn. This configuration ensures that only authorized traffic from the VPN can reach the load balancer.
LB <- VPN
resource "aws_security_group_rule" "ingress_lb_ports" {
  type              = "ingress"
  from_port         = 80
  to_port           = 80
  protocol          = "TCP"
  cidr_blocks       = [var.your_vpn]
  security_group_id = aws_security_group.lb_sg.id
}
The second rule will manage outgoing traffic from the load balancer to the ECS service. This configuration ensures smooth communication between the load balancer and ECS.
LB -> Any IP
resource "aws_security_group_rule" "egress_lb_ecs" {
  type              = "egress"
  from_port         = 0
  to_port           = 0
  protocol          = "-1"
  cidr_blocks       = [var.internet_cidr]
  security_group_id = aws_security_group.lb_sg.id
}
Database
The database will store all the MLflow records that we generate. First, we’ll create a database instance and then insert all the necessary information into the AWS Parameter Store for use in the task definition. Create a new file for this purpose and name it db.tf.
- We’re setting the publicly_accessible attribute to “true,” but we’ll restrict the traffic using the security groups that we’ve previously created.
- You can adjust instance_class as needed for more computational power.
- identifier will serve as the name of the created instance, while db_name will be the name of the database that is generated within the instance.
resource "aws_db_instance" "mlflow-db" {
  allocated_storage      = 10
  db_name                = "mlflowdb"
  identifier             = "${var.app_name}-${var.env}-db"
  engine                 = "postgres"
  engine_version         = "15.2"
  instance_class         = "db.t3.micro"
  username               = "mlflow_db_user"
  password               = random_password.db_password.result
  vpc_security_group_ids = [aws_security_group.allow_ingress_from_vpn.id, aws_security_group.rds_sg.id]
  publicly_accessible    = "true"
  db_subnet_group_name   = aws_db_subnet_group.db_subnet_group.name
  skip_final_snapshot    = true
  storage_encrypted      = true

  depends_on = [aws_internet_gateway.main]

  tags = local.tags
}

resource "random_password" "db_password" {
  length           = 16
  special          = true
  override_special = "!#$%&*()-_=+[]{}<>:?"
}

resource "aws_ssm_parameter" "db_password" {
  name  = "/${var.app_name}/${var.env}/DB_PASSWORD"
  type  = "SecureString"
  value = random_password.db_password.result

  tags = local.tags
}

resource "aws_ssm_parameter" "db_url" {
  name  = "/${var.app_name}/${var.env}/DATABASE_URL"
  type  = "SecureString"
  value = "postgresql://${aws_db_instance.mlflow-db.username}:${random_password.db_password.result}@${aws_db_instance.mlflow-db.address}:5432/${aws_db_instance.mlflow-db.db_name}"

  tags = local.tags
}

resource "random_password" "mlflow_password" {
  length           = 16
  special          = true
  override_special = "!#$%&*()-_=+[]{}<>:?"
}

resource "aws_ssm_parameter" "mlflow_password" {
  name  = "/${var.app_name}/${var.env}/MLFLOW_TRACKING_PASSWORD"
  type  = "SecureString"
  value = random_password.mlflow_password.result

  tags = local.tags
}
Load balancer
In this section, we’ll set up the load balancer along with all the elements it utilizes. The load balancer is essential for managing traffic to our ECS service. By configuring security groups, we can limit the IP range that is authorized to interact with our load balancer, and consequently with the ECS service. Create a new file for this configuration and name it load_balancer.tf
resource "aws_lb" "mlflow" {
  idle_timeout       = 60
  internal           = false
  ip_address_type    = "ipv4"
  load_balancer_type = "application"
  name               = "mlflow"
  security_groups = [
    aws_security_group.lb_sg.id,
  ]
  subnets = [
    aws_subnet.public_subnet_a.id,
    aws_subnet.public_subnet_b.id,
  ]
  tags = local.tags
}
Next, we’ll create a target group along with a health check. The health check ensures that the ECS service is operational. If it passes, the load balancer will direct traffic to the ECS service. In this configuration, matcher = “401” specifies that the health check will be deemed successful if the /ping path returns a 401 status code.
You might be wondering why we’re using a 401 code instead of the more conventional 200. The reason is that we can’t receive a 200 status code unless we’re logged in. There’s an open PR to address this limitation in the future, which you can review here.
resource "aws_lb_target_group" "mlflow" {
  name            = "mlflow"
  port            = 80
  ip_address_type = "ipv4"
  protocol        = "HTTP"
  target_type     = "ip"
  vpc_id          = aws_vpc.main.id

  health_check {
    enabled             = true
    healthy_threshold   = 5
    interval            = 30
    matcher             = "401"
    path                = "/ping"
    port                = "traffic-port"
    protocol            = "HTTP"
    timeout             = 5
    unhealthy_threshold = 2
  }
}
The final step in this process is to create a listener and define the rules it will use.
resource "aws_alb_listener" "mlflow" {
  load_balancer_arn = aws_lb.mlflow.id
  port              = 80
  protocol          = "HTTP"

  depends_on = [aws_lb.mlflow, aws_lb_target_group.mlflow]

  default_action {
    order            = 1
    target_group_arn = aws_lb_target_group.mlflow.id
    type             = "forward"
  }
}

resource "aws_lb_listener_rule" "mlflow" {
  listener_arn = aws_alb_listener.mlflow.id
  priority     = 1

  action {
    target_group_arn = aws_lb_target_group.mlflow.id
    type             = "forward"
  }
  condition {
    source_ip {
      values = [var.internet_cidr]
    }
  }
}
IAM
In this step, we will create a role and policy that will be used by ECS.
data "aws_iam_policy" "cloud_watch" {
  name = "AWSOpsWorksCloudWatchLogs"
}

data "aws_iam_policy" "ecs_task_execution" {
  name = "AmazonECSTaskExecutionRolePolicy"
}

resource "aws_iam_role" "ecs_mlflow" {
  name = "ECSMlFlow"

  managed_policy_arns = [
    aws_iam_policy.access_ssm.arn,
    data.aws_iam_policy.cloud_watch.arn,
    data.aws_iam_policy.ecs_task_execution.arn
  ]

  assume_role_policy = jsonencode({
    Version = "2012-10-17"
    Statement = [
      {
        Action = "sts:AssumeRole"
        Effect = "Allow"
        Sid    = ""
        Principal = {
          Service = "ecs-tasks.amazonaws.com"
        }
      },
    ]
  })

  tags = local.tags
}

resource "aws_iam_policy" "access_ssm" {
  name        = "AccessSSM_MlFlow"
  path        = "/"
  description = "Policy for accessing SSM for MlFlow"

  policy = jsonencode({
    Version = "2012-10-17"
    Statement = [
      {
        Action = [
          "ssm:GetParameter",
          "ssm:GetParameters",
          "ssm:GetParametersByPath"
        ]
        Effect   = "Allow"
        Resource = "arn:aws:ssm:*:*:*"
      },
    ]
  })
}
Task definition
Now, we will be creating a task definition to be used by ECS. Create a new file named task_def.tf.
- container_definitions: This section allows us to configure our container.
- environment: In this section, you can add values that will be available within your container.
- secrets: Since we need to pass passwords, this is a secure way to do it. You are not storing secrets in source code, and AWS will pull the secrets from the Parameter Store, making them available for your container.
resource "aws_ecs_task_definition" "mlflow" {
  execution_role_arn = aws_iam_role.ecs_mlflow.arn
  family       = var.ecs_task_name
  memory       = "3072"
  cpu          = "1024"
  network_mode = "awsvpc"
  requires_compatibilities = [
    "FARGATE",
  ]

  container_definitions = jsonencode(
    [
      {
        environment = [
          {
            name  = "DB_PORT"
            value = "5432"
          },
          {
            name  = "MLFLOW_TRACKING_USERNAME"
            value = "mlflow-user"
          },
        ]
        essential = true
        image     = "${aws_ecr_repository.mlflow_ecr.repository_url}:latest"
        logConfiguration = {
          logDriver = "awslogs"
          options = {
            awslogs-create-group  = "true"
            awslogs-group         = "/ecs/${var.ecs_service_name}/${var.ecs_task_name}"
            awslogs-region        = var.region
            awslogs-stream-prefix = "ecs"
          }
        }
        name = var.ecs_task_name
        portMappings = [
          {
            appProtocol   = "http"
            containerPort = 8080
            hostPort      = 8080
            name          = "${var.ecs_task_name}-8080-tcp"
            protocol      = "tcp"
          },
        ]
        secrets = [
          {
            name      = "AWS_ACCESS_KEY_ID"
            valueFrom = "/${var.app_name}/${var.env}/AWS_ACCESS_KEY_ID"
          },
          {
            name      = "AWS_SECRET_ACCESS_KEY"
            valueFrom = "/${var.app_name}/${var.env}/AWS_SECRET_ACCESS_KEY"
          },
          {
            name      = "MLFLOW_TRACKING_PASSWORD"
            valueFrom = "/${var.app_name}/${var.env}/MLFLOW_TRACKING_PASSWORD"
          },
          {
            name      = "ARTIFACT_URL"
            valueFrom = "/${var.app_name}/${var.env}/ARTIFACT_URL"
          },
          {
            name      = "DATABASE_URL"
            valueFrom = "/${var.app_name}/${var.env}/DATABASE_URL"
          },
        ]
      },
    ]
  )

  runtime_platform {
    cpu_architecture        = "X86_64"
    operating_system_family = "LINUX"
  }
  tags = local.tags
}
Cluster
To create an ECS service, we first need to establish an ECS cluster where the service will run. When you set up a cluster via the AWS console, a capacity provider is created automatically. However, if you’re using Terraform, you’ll need to specify the capacity provider as a separate resource. Create a new file named ecs.tf for this purpose.
resource "aws_ecs_cluster" "mlflow_ecs" {
  name = "${var.app_name}-cluster"

  setting {
    name  = "containerInsights"
    value = "enabled"
  }
}

resource "aws_ecs_cluster_capacity_providers" "base" {
  cluster_name = aws_ecs_cluster.mlflow_ecs.name

  capacity_providers = ["FARGATE"]

  default_capacity_provider_strategy {
    weight            = 10
    base              = 1
    capacity_provider = "FARGATE"
  }
}
ECS
The final component we’ll set up is the ECS service.
- To enable ECS to create a target in the target group, it’s essential that the entire load balancer configuration is prepared first. That’s why we use the depends_on attribute.
- To allow access to MlFlow from the internet, we’re assigning a public IP. However, access is restricted at the load balancer level to the IP range you’ve selected (I’d recommend using the VPN you are on for this).
resource "aws_ecs_service" "mlflow" {
  health_check_grace_period_seconds = 0
  name                              = var.ecs_service_name
  enable_ecs_managed_tags           = true
  propagate_tags                    = "NONE"
  cluster                           = aws_ecs_cluster.mlflow_ecs.id
  task_definition                   = "${aws_ecs_task_definition.mlflow.family}:${aws_ecs_task_definition.mlflow.revision}"
  desired_count                     = 1

  tags = local.tags

  depends_on = [
    aws_lb.mlflow,
    aws_alb_listener.mlflow,
    aws_lb_target_group.mlflow,
    aws_lb_listener_rule.mlflow,
    aws_ecs_task_definition.mlflow
  ]

  deployment_circuit_breaker {
    enable   = true
    rollback = true
  }

  deployment_controller {
    type = "ECS"
  }

  capacity_provider_strategy {
    base              = 1
    capacity_provider = "FARGATE"
    weight            = 10
  }


  load_balancer {
    container_name   = var.ecs_task_name
    container_port   = 8080
    target_group_arn = aws_lb_target_group.mlflow.arn
  }

  network_configuration {
    security_groups = [
      aws_security_group.ecs_sg.id,
      aws_security_group.rds_sg.id,
    ]

    subnets = [
      aws_subnet.private_subnet_a.id,
      aws_subnet.private_subnet_b.id,
    ]
  }
}
Conclusion
I hope this guide has walked you through every step of setting up MLflow on AWS ECS using Terraform. Implementing MLflow in such a structured and automated environment not only streamlines your data science workflow but also makes it more scalable and maintainable for the long term.
If you’ve found this guide useful, don’t forget to subscribe to our newsletter. We regularly share insightful articles, tips, and how-to guides on various tech topics that can help you stay ahead in your field. Don’t miss out — subscribe today!